
 |
| Sorry for the fuzziness... Using a point and click camera. I really need to learn to use my better camera! |
Fabric: $4.37 (5/8 yard @ $6.99/yard, normally $9.99/yard [I already had the brown fabrics for the coat, so I only had to buy the fabric for the top/skirt])
Thread: $1.05 (normally $1.75 each)
Braiding for the coat: $2.46 (40% off 2.75 yards at $1.49/yard)
Hook and Eye enclosures: Again, I already had some of these, so $0
Pattern: $0 (my lovely friend whose daughter is receiving this as a birthday gift is paying me back for the pattern, so I won't count this in the cost)
Total Cost with tax: $7.88
This was definitely a fun project, because it was so cute to see the little clothes coming together as I went. I will say though that it was pretty difficult in some spots, and my husband discovered that I can make quite the creepy, guttural noises when I'm really irritated with something. Nonetheless, it was well worth it because a fabulous little girl who just turned 8 will be receiving this as a gift.
I didn't take pictures as I started the process since the pattern was pretty self-explanatory. But I did take some pictures of the more difficult stuff to showcase things I learned along the way.

Meet Morton. I don't have any good dolls to use as a model while making doll clothing. I have a son, so this is the best I've got. And so Morton was my lovely and gracious model during the process.

As you can see, I started with the top. It was fairly simple and straight forward. The only part that was a little bit tricky was lining up the velcro in the back, but thankfully my velcro happened to have sticky stuff on it, making this task fairly simple. Once I placed the sticky sides on the fabric, I just sewed around the velcro to attach it to the shirt.

The pattern calls for snaps on the arms, but since I don't have any snaps lying around, I used hook and eye enclosures. I figured this was a little more authentic to the time period of the clothing anyway (or maybe I just made that up to justify my lack of basic notions...)

Next came the skirt. This was even more simple than the top, and again, I used a hook and eye enclosure in the back instead of snaps.
Something to note - on both the top and skirt when it called for being hand sewn, I passed on that whole nonsense and used my sewing machine. I figured someone with incredible ingenuity created this machine for the purpose of avoiding sewing items by hand, and so I wanted to pay homage to that. I

The first part of putting the coat together was very simple. I sewed the outside coat pieces and inside lining pieces together, then started on the hood.

This too was pretty simple. The pattern didn't call for it, but I top-stiched 1/4" in from the edge. Since the lining isn't cotton fabric and tends to be a little unruly, it just made for a cleaner and more manageable edge. Then I attached it to the coat as instructed.

This is when I started grunting, though not too audibly yet. It seems whoever created the pattern for this project assumed that the person making these clothes would be a more advanced seamstress than myself.
 |
| The thing you see sticking out like a tongue is the hood between the pieces of fabric |
So if you decide to make this pattern, or anything similar in the future, make SURE you stick the hood in between the lining and the outer coat fabric.

At this point I had to take a break to harvest my farm. I was beginning to resemble a certain Patrick Star, thanks to my brain gears burning out from all that hard thinking stuff!

Now I had to attach the sleeve lining to the outer sleeve fabric. I vaguely remember this being the point when my grunts turned into mutterings outward displays of profanities and such, similar to King George VI (Colin Firth) in the King's Speech. Seriously, what beginning sewer can understand these directions: "Re-pin sleeves, RIGHT SIDES TOGETHER, matching notches and seams. Stich." Maybe it's just moi, but that's not at all self-explanatory.
What this REALLY means (thanks to this fabulous tutorial) is that after you've pulled the sleeves through the opening at the bottom of the jacket, you have to roll the outer fabric over a bit and pin the lining fabric to it. So here's a semi step-by-step as I rolled, pinned, and stitched.
 |
| Step 1 - Roll the outer coat fabric up a bit, like 1/2" or so |
 |
| Step 2 - Pin the lining fabric to the outer fabric after sliding it over the roll |
 |
| The sleeves look like this once pinned together correctly |
 |
| Step 3 - Stitch the sleeves together |
 |
| You'll know you followed these steps correctly if this is what your end result looks like |
Thinking I was finally through with the most difficult part of my project, I then moved on to attaching the braiding to the coat.
 |
| The dark spot you see on the braiding is anti-fray gel |
Pinning the braiding on was a breeze, but my machine was just not having it.
I am a constantly evolving Spongebob Squarepants character.

So here's the final result once the braiding was attached to the outer edges of the coat. I still had to attach it to the sleeves. Once I did that, I started the final piece of the outfit - the muff for the hands.

The pattern calls for attaching the outer fabric and lining pieces together, then creating a casing for elastic. Again, this wasn't all that intuitive, as they didn't mention leaving an opening on each end (near the seam) for the elastic to enter and exit out of. This is how that should look...
 |
| Entering |
 |
| Both sides with elastic through, stitched together, and trimmed |
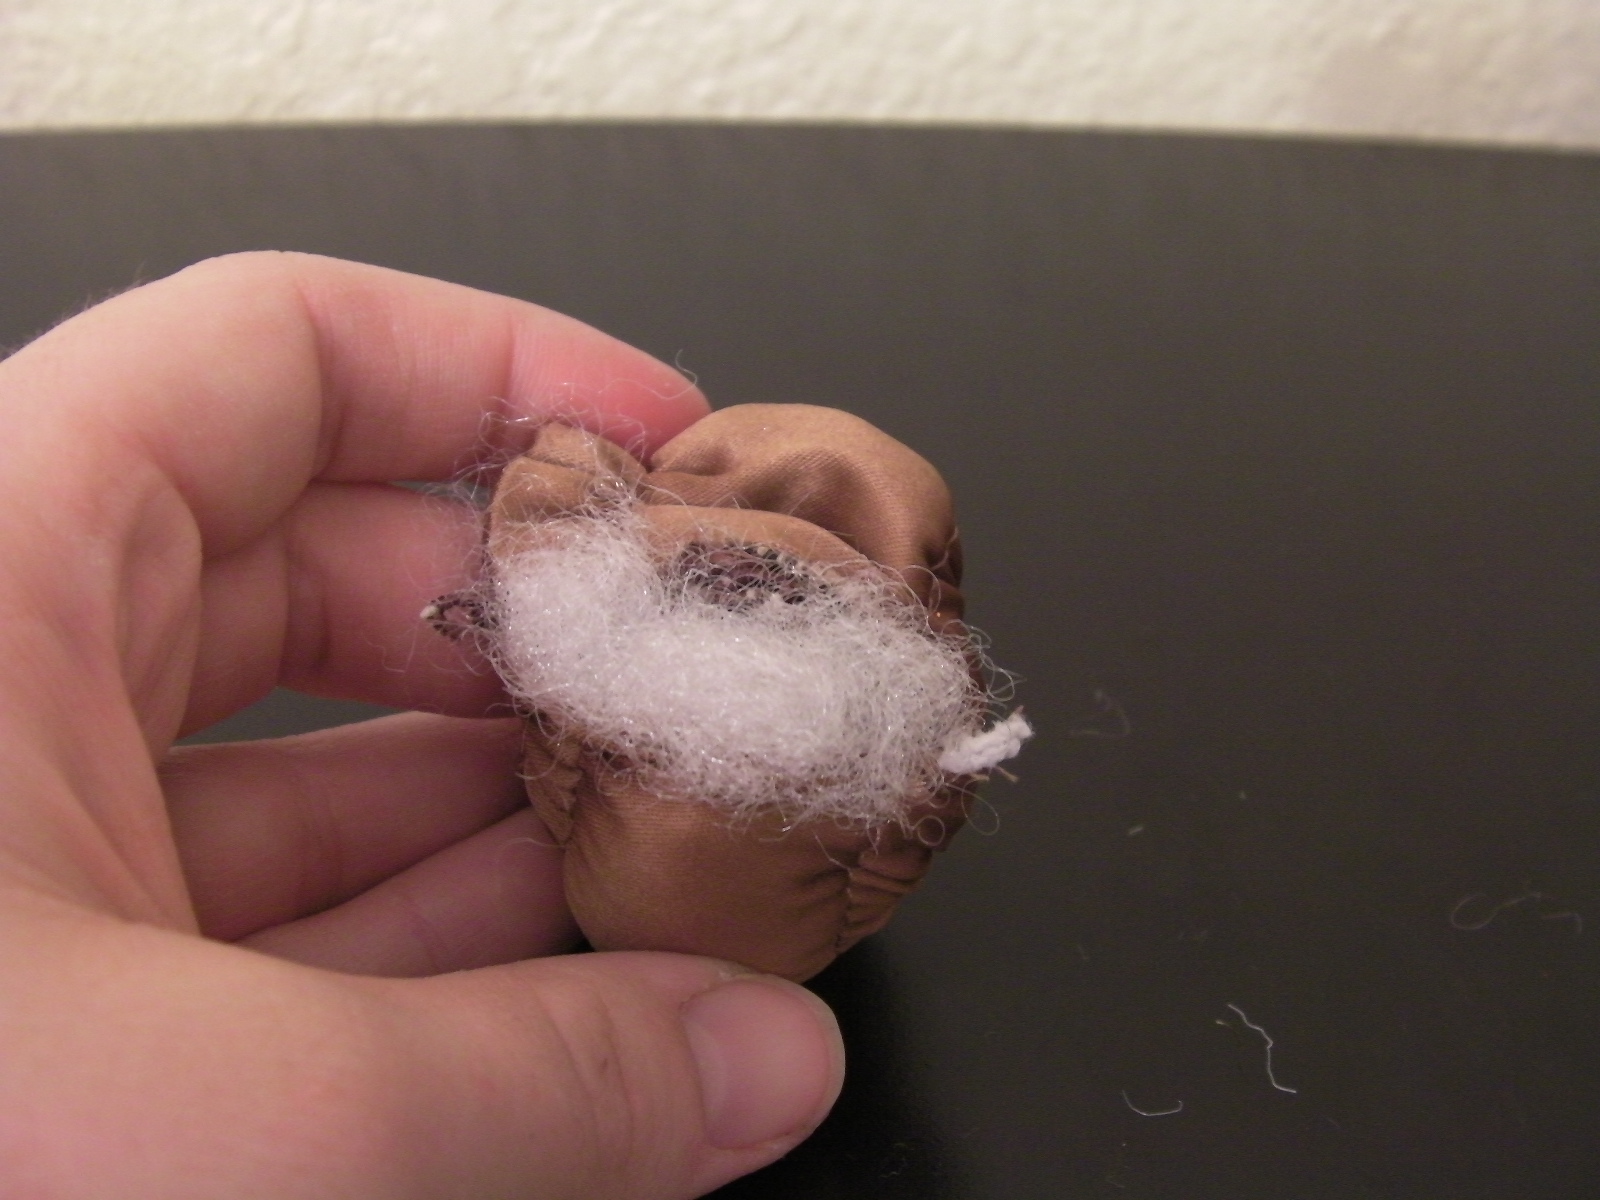
I didn't have any batting around, so I found another solution. Who would've thought that taking out one's aggressions on a defenseless teddy would feel SO good?

I then inserted the batting into the muff. I ended up using the dull end of my seam ripper to stuff it in and make the shape more uniform. It was rather bumpy and uneven before doing so, and my fingers didn't seem to be able to push it hard enough.
Once the batting was completely in, I hand-stitched (GAH, the sewing machine just couldn't do this job) the muff shut, and the project was complete!

Morton approves!
Remind me to show you a trick about sleeves next time we meet.
ReplyDelete